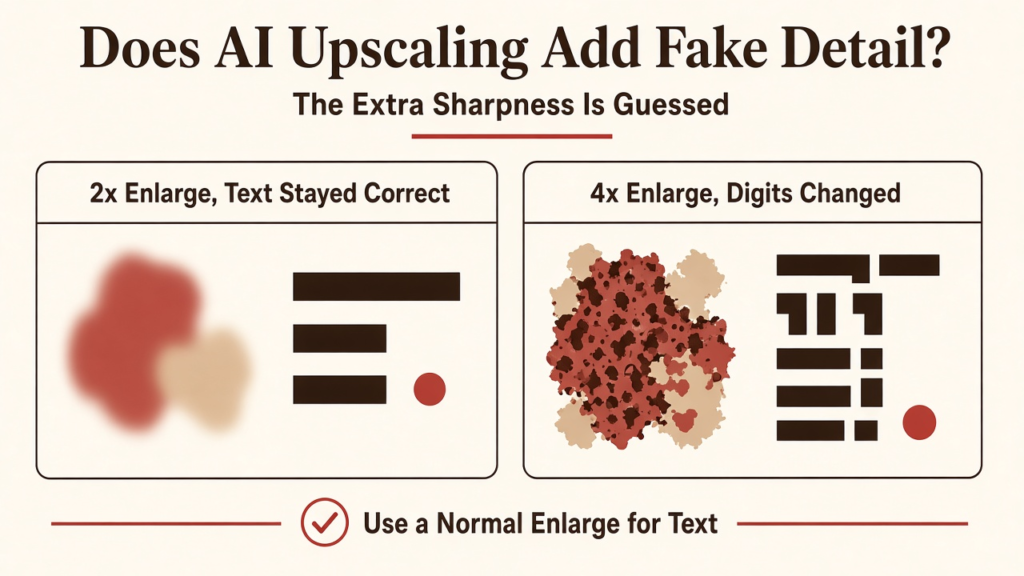
Yes. An AI upscaler fills the missing pixels with detail it guesses from training, not detail it recovers. In my test, a 2x enlarge stayed faithful and sharp, but a 4x enlarge of tiny text turned real digits into different ones. Use AI for wallpapers and prints. Use a normal enlarge for text, numbers and anything that must stay true. Both can run offline for free.
You have a small photo and you need it big. You drop it into an AI upscaler, and out comes a sharp, clean image that looks better than the original ever did.
That should make you a little suspicious. Where did the extra sharpness come from?
I tested it with a simple trick: I took photos I already had in full size, shrank them, and asked each method to enlarge them back. Because I kept the real original, I could check every result against the truth. Here is what I found, and how to upscale offline for free without getting fooled.
Why a Photo Gets Blurry When You Make It Bigger
A bigger photo needs more pixels than the small one has, so most of them must be made up.
Start with the base fact. A digital photo is a grid of pixels (tiny squares, each holding one colour). A photo that is 100 pixels wide simply has 100 squares of real information across.
Then enlarge it 4x. The width grows 4x and the height grows 4x, so the grid gets 16 times more squares. Only 1 in every 16 squares comes from the original. The other 15 have to be filled in by something.
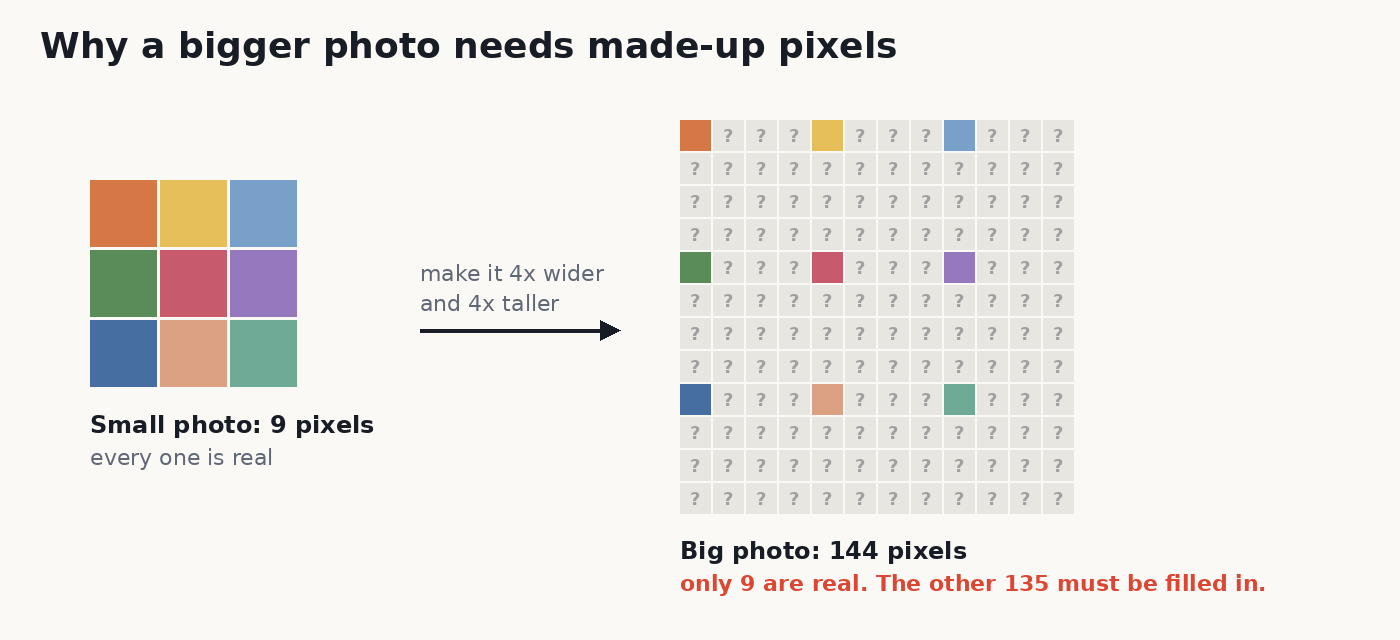
That filling step is what upscaling (making an image bigger in pixels) really means. Every upscaler, cheap or clever, is answering one question: what goes in the empty squares?
Normal Enlarge vs AI Upscaling
A normal enlarge blends nearby real pixels. An AI enlarge paints in what it thinks should be there.
The normal way is called interpolation (estimating an in-between value from the values around it). Bicubic and Lanczos are two common recipes for it, and they are what your photo editor uses when you resize. If one pixel is dark grey and its neighbour is light grey, the squares between them get smooth steps of grey. Nothing is invented, which is why the result looks soft.
The AI way uses a trained model (a program that learned patterns from many examples instead of following fixed rules). Real-ESRGAN is the open model behind Upscayl and other free upscalers. It was trained on pairs of sharp images and artificially damaged copies of them, so it learned what a sharp edge, a strand of hair or a brick texture usually looks like.
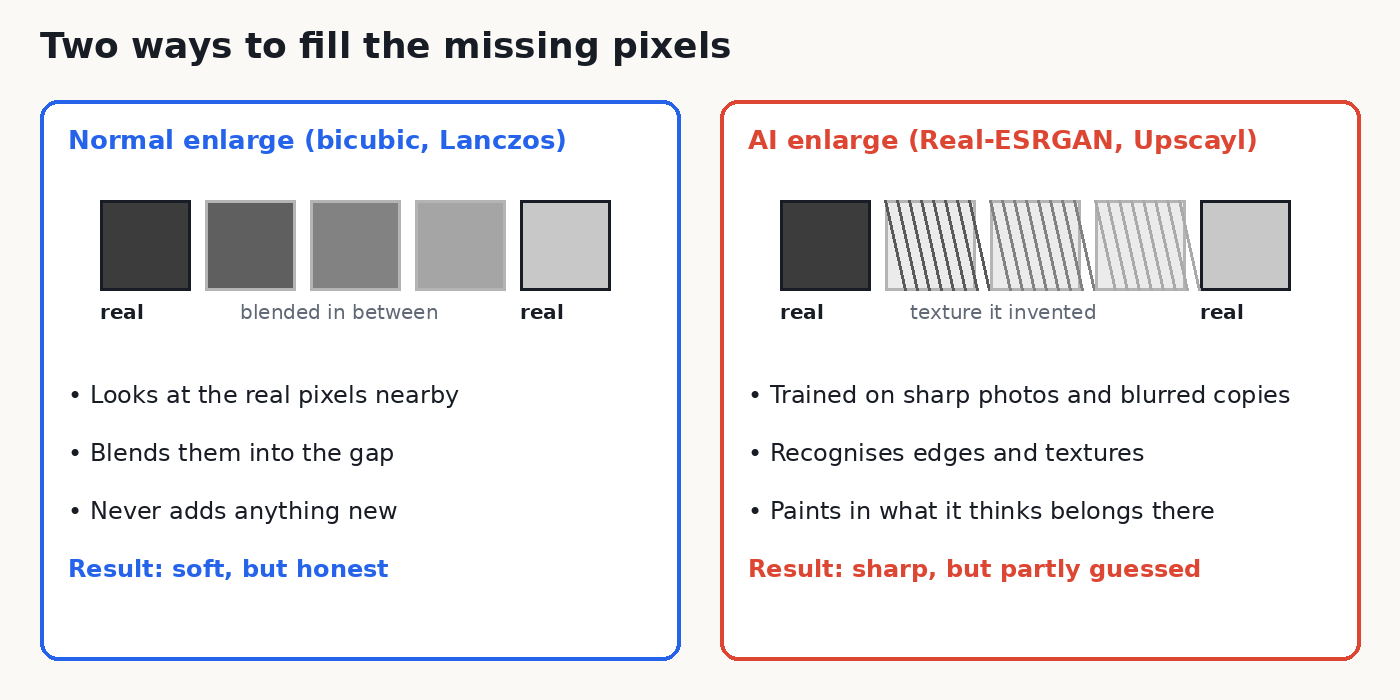
So think of a smudged word on a page. Interpolation copies the smudge carefully. The AI reads the smudge, decides which word it probably was, and writes that word out neatly. Most of the time it guesses right. Sometimes it writes a different word in perfect handwriting.
The Extra Sharpness Is Guessed, Not Recovered
No. It adds believable detail, and on photos it was less faithful to the real image than a plain resize.
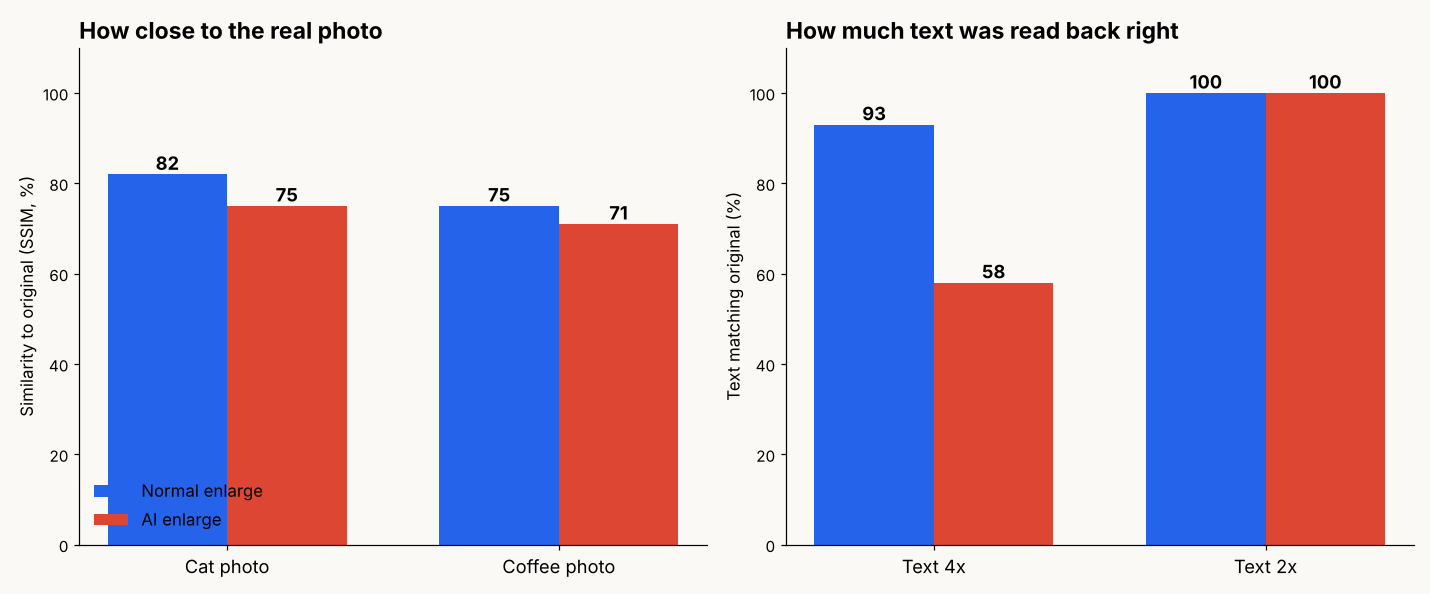
To measure “faithful”, I used SSIM (a score, usually shown from 0 to 100%, for how closely two images match in shape and texture, where 100% means identical). Each enlarged result was scored against the real full-size photo.
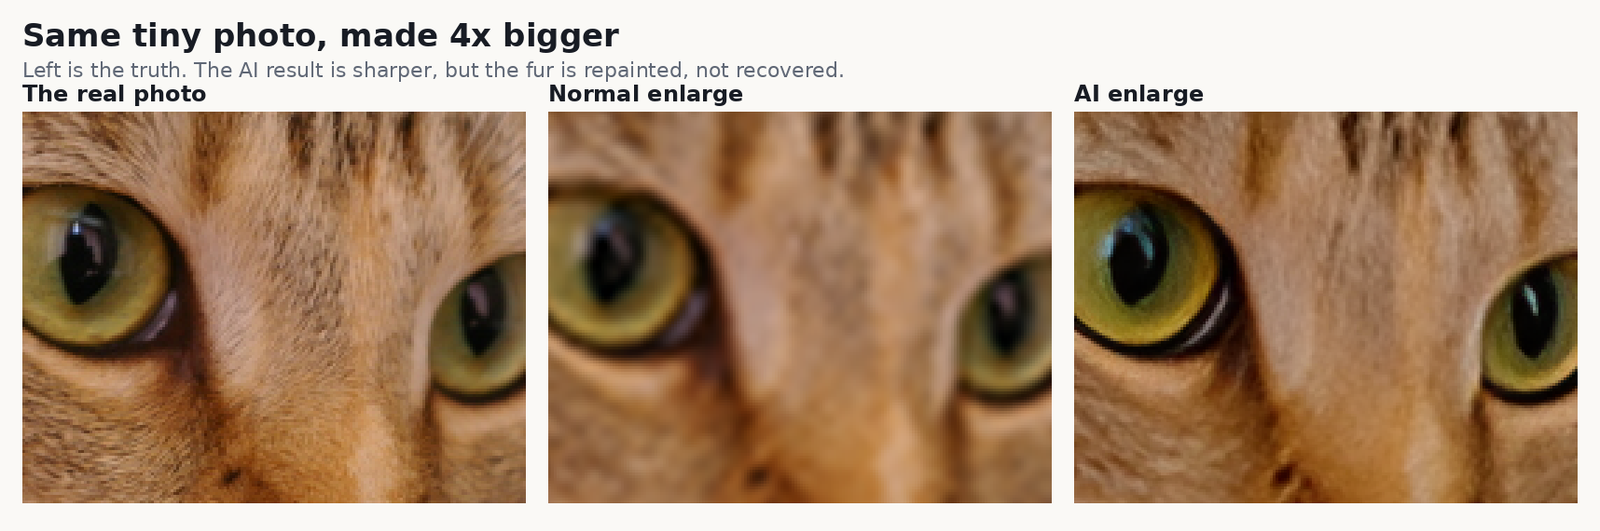
On a cat photo, the normal enlarge scored 82% and the AI enlarge scored 75%. On a coffee cup photo, normal scored 75% and AI scored 71%. The AI images looked sharper to the eye both times, yet they matched the real photos less.
Look at the cat again and the reason is clear. The eyes come out crisp, which looks great. The fur does not come back at all. It gets smoothed into a painted texture, because the tiny photo never held those hairs and the model can only draw something hair-like.
A 4x Enlarge Changed Real Digits
Yes. At 4x on tiny text, it drew sharp digits that were the wrong digits.
This test is the one that matters most. I made an invoice-style image with a card number ending, a total and a phone number, shrank it 4x, and enlarged it back. Then I ran OCR (software that reads text out of an image) on every result to see what a reader, or a machine, would take from it.
The normal enlarge was blurry but mostly honest: the OCR text matched the original 93%, and you can still make out “5806” by eye. The AI enlarge looked far crisper, yet its OCR text matched only 58%. “Card ending 5806” came out looking like “5003”, and the phone number’s last digits turned into different shapes.

The second test is the fair one. I shrank the same image only 2x, so each letter kept enough pixels. This time the OCR text from both methods matched the original 100%, and the AI version was sharper and closer to the original (99% vs 96% on SSIM).

So the rule follows straight from the pixel grid. When the real information is still there, the AI cleans it up beautifully. When the information is gone, it does not stop. It guesses, and a confident guess looks exactly like a fact.
How to Upscale an Image Offline for Free
Upscayl is the easy free app if you have a graphics card. Without one, a short Python script runs the same kind of model on your processor.
Offline matters for two reasons. The photo is processed on your own computer, and there is no watermark, credit limit or monthly plan. The same idea is behind the guide on removing backgrounds from many images offline.
For most people, Upscayl is the answer. It is a free, open source desktop app for Windows, Mac and Linux. It uses Real-ESRGAN. The project also runs a separate cloud service, but the desktop app is the free, local part.
The one requirement is a GPU (graphics card) that supports Vulkan (a standard way for apps to use the graphics card). The project warns that many built-in laptop graphics chips will not work. Get it from upscayl.org or install it on a Mac with brew install --cask upscayl.
No graphics card? That was my situation, so I ran Real-ESRGAN with PyTorch (a free library for running AI models in Python) on a basic 2-core machine. These are the steps that worked:
- Install the libraries:
pip install torch spandrel pillow numpy - Download the model file
RealESRGAN_x4plus.pthfrom the Real-ESRGAN project page - Save the script below as
upscale.pynext to the model file - Run
python upscale.py photo.png photo_4x.png
import sys, numpy as np, torch, spandrel
from PIL import Image

model = spandrel.ModelLoader().load_from_file("RealESRGAN_x4plus.pth").eval()
img = Image.open(sys.argv[1]).convert("RGB")
x = torch.from_numpy(np.array(img)).permute(2, 0, 1).float().unsqueeze(0) / 255
with torch.no_grad():
 y = model(x)
out = (y[0].permute(1, 2, 0).clamp(0, 1).numpy() * 255).round().astype(np.uint8)
Image.fromarray(out).save(sys.argv[2])
print(img.size, "->", out.shape[1::-1])Spandrel (a small library that loads upscaling model files without extra setup) does the heavy lifting.
So how slow is it? A 150 by 100 pixel image took about 6 seconds end to end. A 960 by 640 photo, enlarged to 3840 by 2560, took about 2 minutes 20 seconds.
That bigger photo also needed tiles (small squares processed one at a time). Sent in as one piece, the run died before it finished.
What is the catch? Speed and memory. A graphics card does the same job many times faster, which is why Upscayl insists on one.
When to Use an AI Upscaler
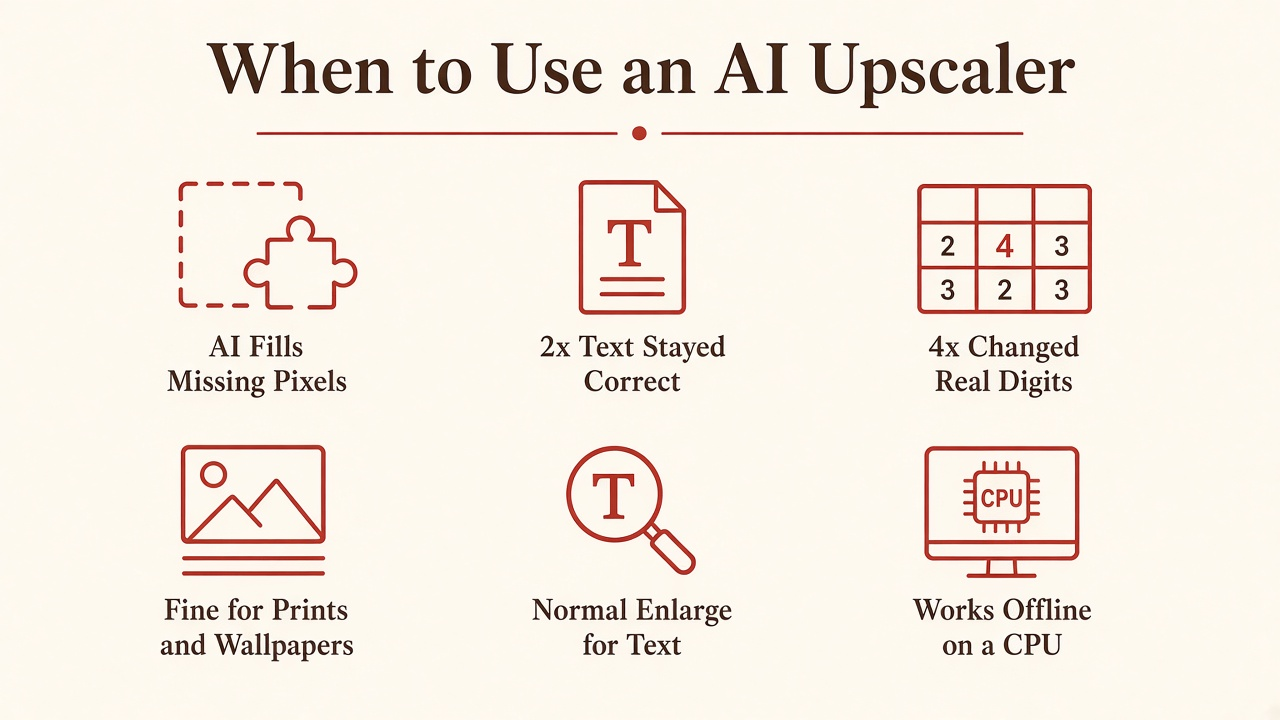
Use AI when the picture only has to look good. Skip it when the exact detail has to be true.
Still, there is a fair case for AI everywhere. If you are printing a holiday photo or making a wallpaper, nobody checks whether each strand of fur is the real one, and the sharp version simply looks better. For that job, AI wins.
For everything else, the test points one way. Screenshots of documents, receipts, number plates, scanned forms, small faces and anything used as proof should get a normal enlarge. A wrong digit drawn sharply is worse than a right digit drawn soft.
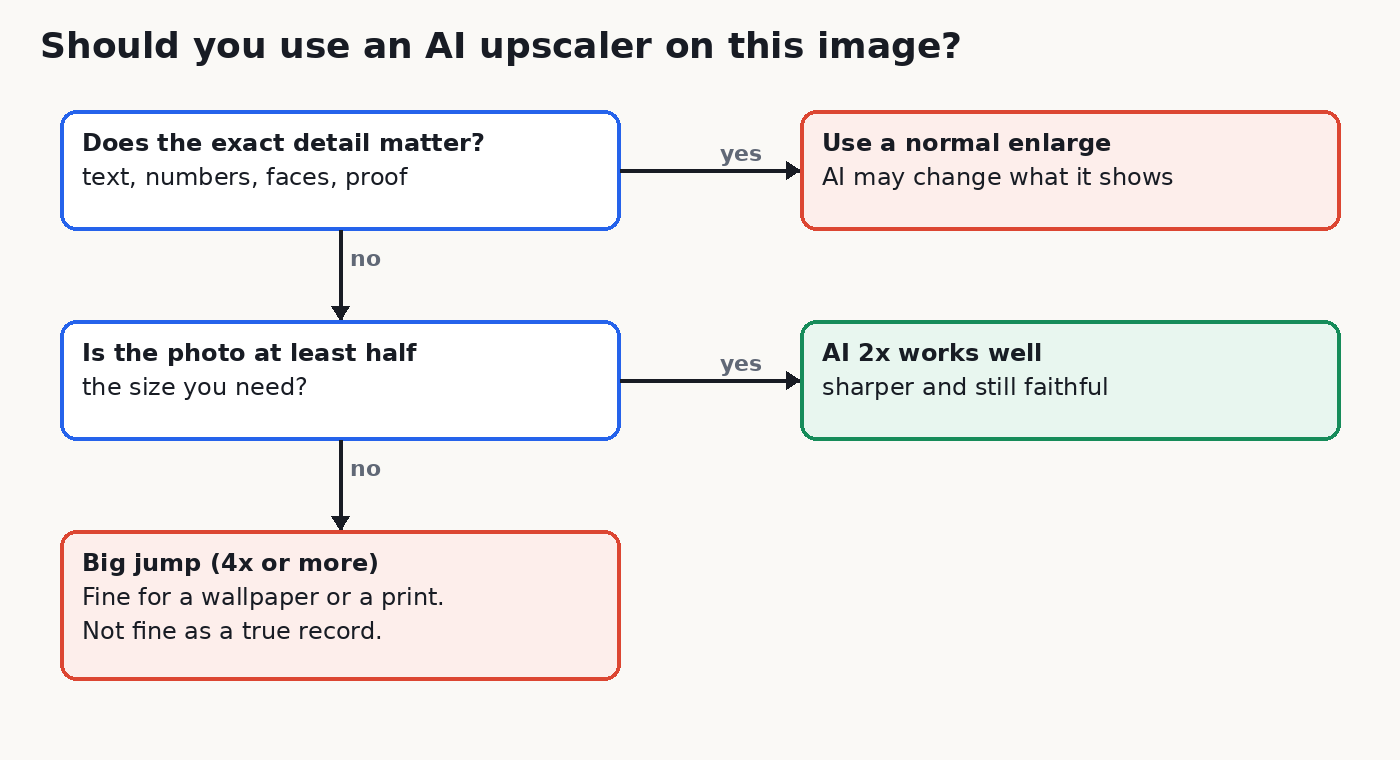
The size of the jump matters too. Going 2x from a decent photo was both sharp and faithful in my test. Going 4x from something tiny is where the guessing takes over. If you need a smooth result for a moving image instead, the same “keep the real detail” thinking applies to turning a video into a GIF without losing quality.
So keep the original next to the enlarged copy. If the two disagree, believe the small one.